Workflow Designer
The Workflow Designer provides a visual, no-code environment for creating multi-step workflows. It enables you to design automation logic by arranging nodes on a drag-and-drop canvas, configuring their settings, and connecting them to define the flow of data.
You can start with a blank workflow or use a template. Add nodes for each step, configure their inputs and outputs, and then attach the workflow to an agent to run it in the chatbot.
Use this guide to understand key components of the Workflow Designer and how to build workflows efficiently.
To build and run a workflow in a few minutes, see the Quickstart.
The Workflow Designer includes the following components:
Canvas
The canvas is the primary workspace for building workflows. Use it to place, organize, and connect nodes that define your workflow logic.

Canvas Interactions
Use the following interactions to navigate and manage elements on the canvas:
-
Move nodes: Select a node and drag it to a new location.
-
Pan the canvas: Click and drag on an empty area of the workspace to move the view horizontally or vertically.
-
Connect nodes: Drag from an output connector to an input connector on another node.
-
Rearrange connections: Disconnect and reconnect node edges directly from the canvas.
-
Grid lines: Use grid lines for visual alignment and layout consistency.
-
Search nodes: Use the search field in the Node Library to filter nodes by name. Enter a keyword to display matching nodes across all categories.
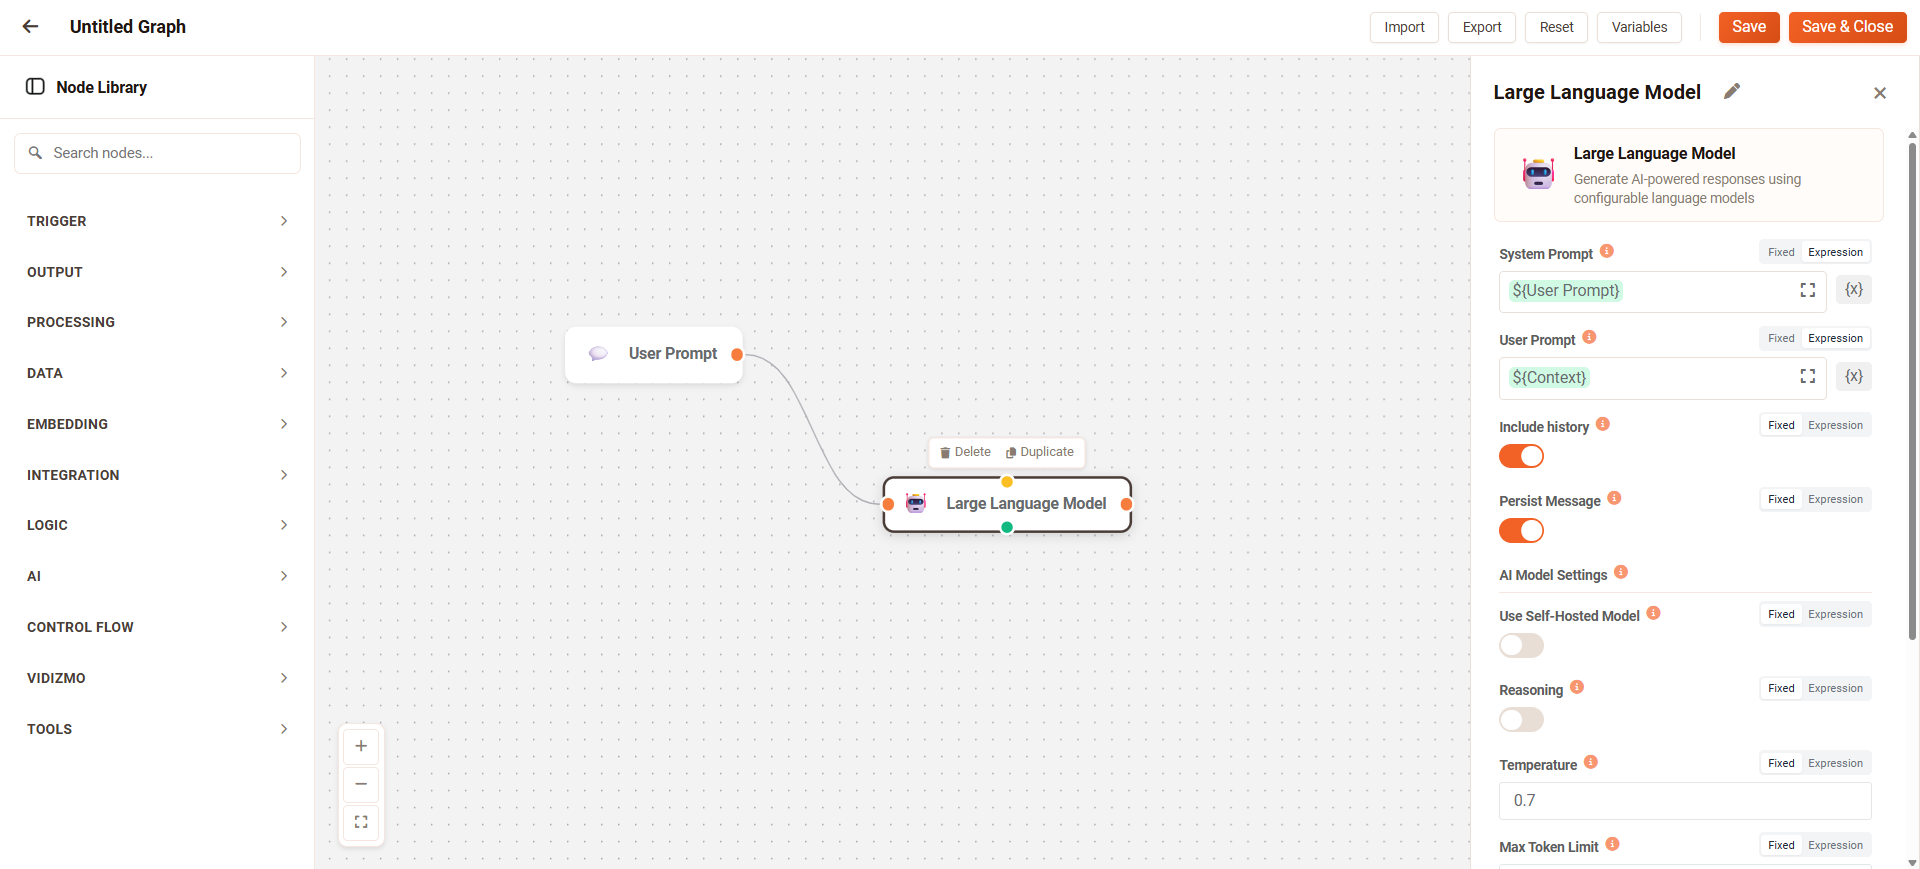
Node Actions
Right-click a node or hover over it to access the following actions:
-
Delete: Remove the node from the workflow. All associated connections are also removed.
-
Duplicate: Create a copy of the node with the same configuration.
Zoom Controls
You can zoom in and out to better view your workflow:
-
Scroll using your mouse or track pad (forward to zoom in, backward to zoom out).
-
Use canvas zoom controls:
-
+ Zoom in
-
– Zoom out
-
[ ] Zoom to fit the entire workflow in view
Minimap
The minimap provides an overview of larger workflows:
-
Displays a scaled-down view of the entire workflow
-
Highlights the current viewport
-
Allows you to click or drag to jump to different areas
Keyboard Shortcuts
| Action | Shortcut |
|---|---|
| Zoom in | Ctrl + Plus |
| Zoom out | Ctrl + Minus |
| Move multiple nodes | Shift + Click (select multiple, then drag) |
| Delete multiple nodes | Ctrl + Click (multi-select) + Delete |
Essential Controls (Toolbar)
The toolbar provides workflow-level actions and configuration options.
Edit workflow details
Configure basic workflow settings:
-
Name
-
Description
-
Recursion Limit: Defines how many times a circular path can run. Default is 25.
-
Enable Checkpoint: Captures workflow snapshots so updates can resume from a stable state.
Share
Options for importing and exporting workflows:
-
Import: Load a workflow into the Designer using a JSON file.
-
Export: Download the workflow as a JSON file for backup or reuse.
Additional Settings
-
Reset: Reverts the workflow to the last saved version.
-
Variables: Store reusable values that can be referenced across nodes. To learn more refer Variable documentation.
Save Workflow
Choose how you want to save changes:
-
Save: Saves the current workflow.
-
Save and Close: Saves and exits the Designer.
Node Library
The Node Library organizes available nodes into categories, making it easy to locate components for your workflow.
Capabilities include:
-
Search: Filter nodes by name.
-
Add node: Click the + icon when hovering a node or drag it directly onto the canvas.
-
Opening the Node Configuration Panel automatically after adding a node.
Node Configuration Panel
The Node Configuration Panel appears when you select or add a node. Use it to define how the node behaves within your workflow.
Panel Capabilities
-
Configure required parameters (marked with *)
-
Specify optional settings
-
Opens automatically when a node is added
-
Stays open as you select different nodes
-
Can be minimized to expand canvas visibility
Node Connectors
Connectors define how data moves between nodes. They appear as colored circular icons (●) around a node’s border.
How to Connect Nodes
-
Click an output connector (●) on the source node.
-
Drag the edge toward the target node.
-
Release on an input connector (●) of the target node.
-
A line appears, indicating a successful connection.
Connector Behaviors
-
Solid line: Standard connection
-
Dotted line: Represents parallel execution paths
-
Matching colors: Connectors must share compatible data types
-
Deleting connections: Select the line and press Delete
-
Deleting a node: Removes all associated connections
Next Steps
Now that you understand the Workflow Designer interface and its core components, you're ready to begin building workflows that power intelligent agent behaviors.